Imagery 101
The Basics
To understand what makes a well exposed image it is necessary to become acquainted with the elements that are used to make an image. While there are many variables to consider, there are 3 main elements that together make up what is known as
The Exposure Triangle
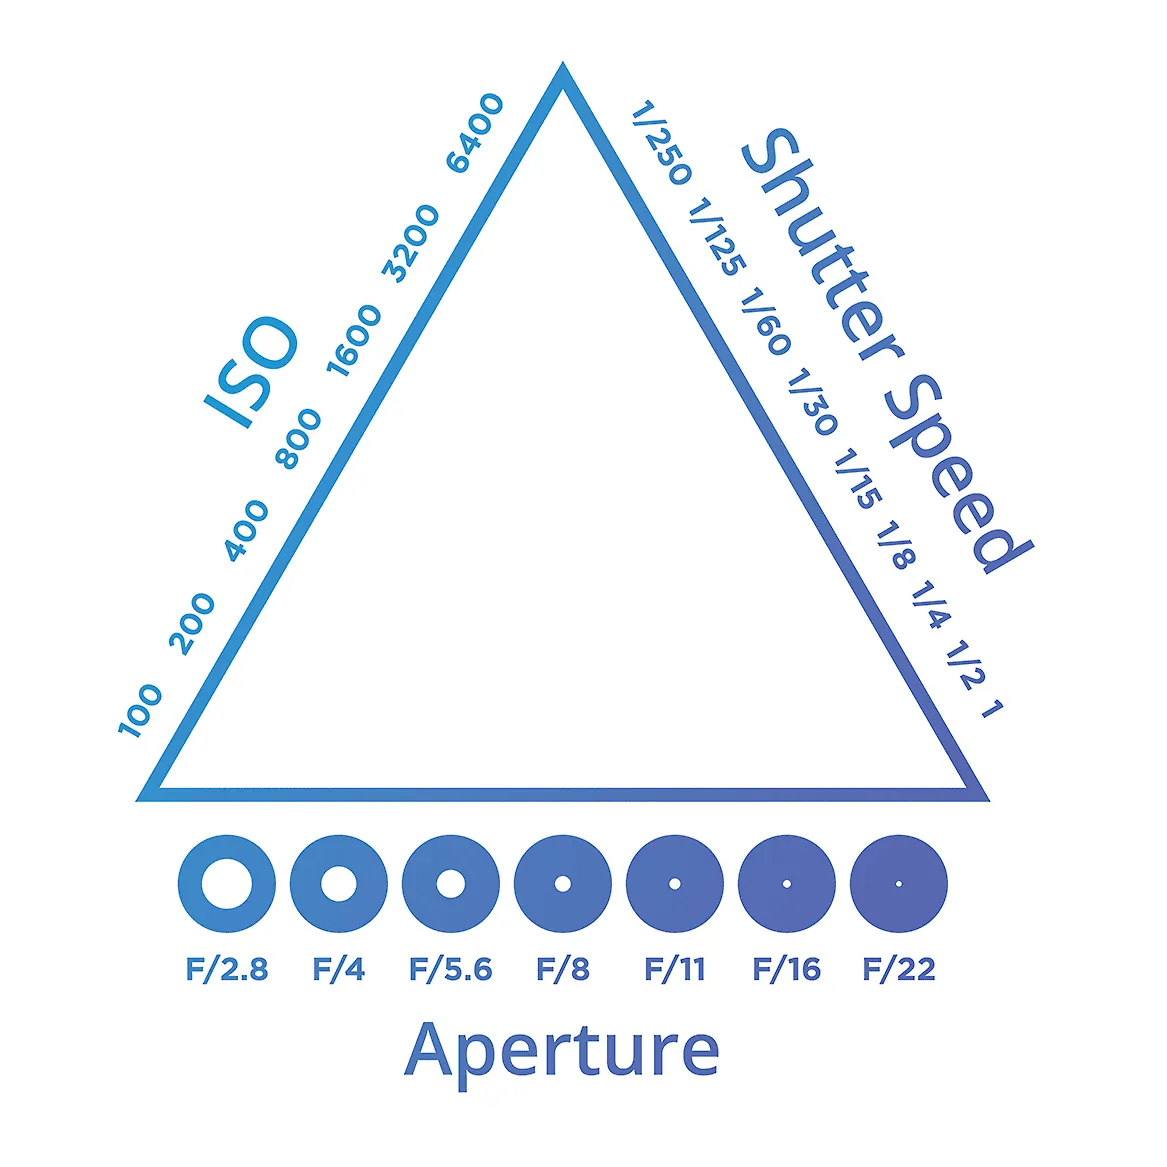
Aperture Shutter Speed ISO
In this step we will explore the Exposure Triangle and clarify how each element relies on the other two to make a well exposed image. By understanding how to expose an image properly, you will be able to capture photographs with high levels of detail in both the shadows and highlight areas.
ISO (sensitivity to light)
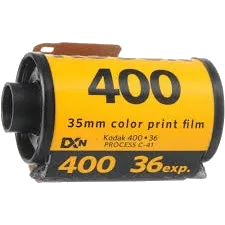
Prior to the digital age, when film was used in cameras, an image maker was only able to control 2 of these elements until the roll of film was used and a new roll with more or less sensitivity could be loaded. That was because the roll film was predetermined to have a level of sensitivity that could not be changed. This level was called the ASA rating and was prominently displayed on the outside of the canister that held the light sensitive film.
Today we know the sensitivity of the digital sensors by the ISO number. ISO refers to the International Organization for Standardization. A benefit today is that each and every image created using a modern camera can use a different ISO.
*** Note for image makers using mobile devices, unless you download a third party app, changing any one of the elements in the Exposure Triangle is not possible. There is some in camera processing you can do after you take the picture. It should also be noted that cell phone cameras have come a long way and for posting and sharing on social media, they have a distinct advantage with more than acceptable image quality. One way you can change the exposure manually on your phone camera is by simply tapping on the screen and when you see the sunburst symbol, use your finger to swipe up or down to lighten or darken the image. The camera is actually adjusting all of the exposure variables to display the image you see.
Higher values of ISO mean that the sensor does not need as much light to make a correct exposure. Low ISO values mean that the sensor will need more light. Back in the days of film, there wasn't as much flexibility as there is now. As noted earlier, the sensitivity was set until the roll of film was finished and replaced with another roll, possibly with a different sensitivity value. Today, the control of the sensitivity of the digital sensor can be done on the fly. For digital cameras the sensitivity control is actually increasing or decreasing the electrical amplification.
Here is the ISO scale
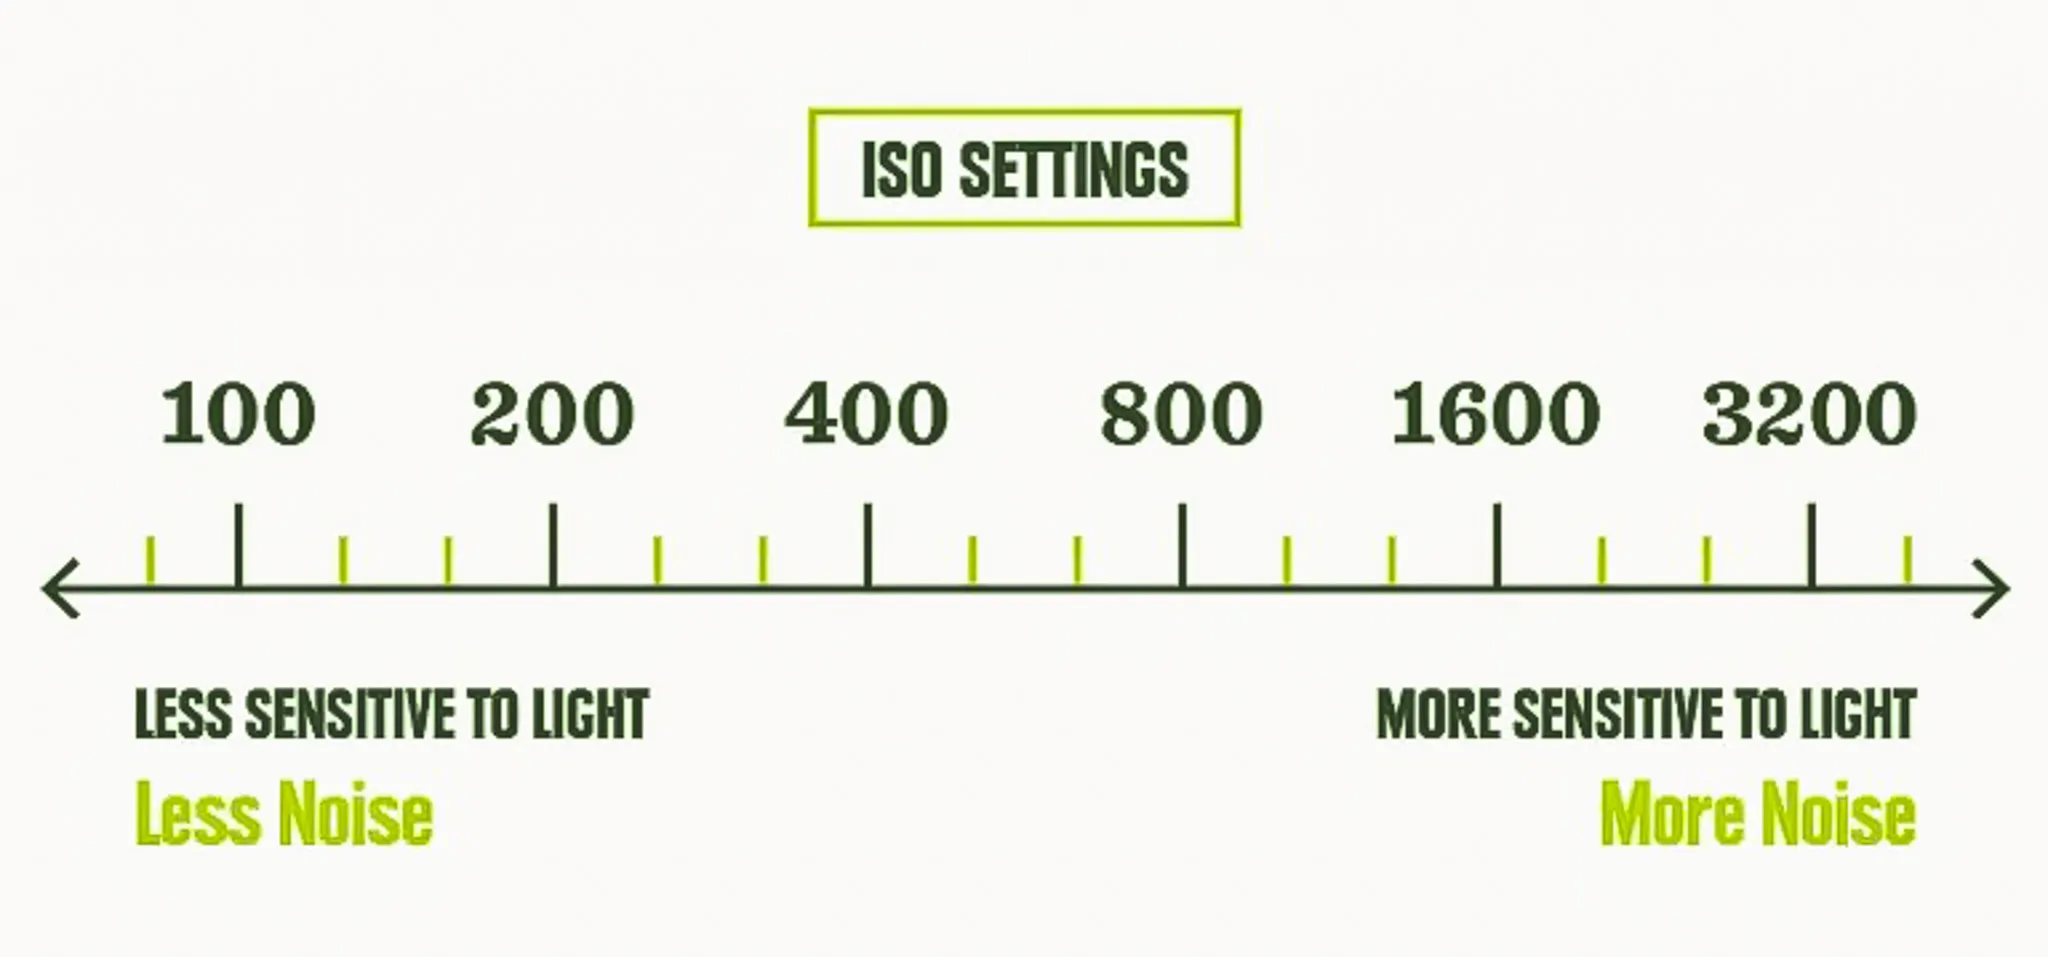
If you think of ISO in terms of compensating for darkness or lack of light, it will help you to remember when to increase or decrease it. In both film and digital cameras, the higher the ISO number, the more grainy or "noise" there will be. Balancing the amount of noise and a proper exposure takes practice.
Aperture
Aperture refers to the size of the circular hole in the lens that lets in light. The bigger the hole, the more light that reaches the sensor. The numbers for apertures do not correspond to any regular system we are acquainted with. They are not like numbers on a clock or use a base 10 system like the Metric System.
They are: 2, 2.8, 4, 5.6, 8, 11, 16, 22
Some lenses for cameras will have other numbers like 1.8. This next statement is important to grasp. The smaller number actually is a bigger hole in the lens. That's because a key piece of information is missing from the above numbers. They should be thought of as fractions:
1/2 1/2.8 1/4 1/5.6 1/8 1/11 1/16 1/22
It should make more sense now that if you have 1/2 of something you have more than if you have 1/8 th of something. So If you use an aperture of 2 (1/2) you are letting in more light because the hole is bigger than an aperture of 8 (1/8). In the field, you may often hear others refer to these as F numbers. (f2 or f5.6) You can think of the F as referring to the word 'Fraction' and it will help to understand the size of the opening in the lens.

There are very specific reasons why you would want to change the aperture settings and since this topic is about exposure, one reason to change the aperture setting is related to the amount of light available. For outdoors this change is based on time of day and whether the sun is shining bright or not. For indoors, this will be affected by the amount and type of light source. Flash units provide temporary light and can be controlled for the amount of light they put out. Professional lighting equipment also provides a reliable source. Other light sources from candles to incandescent and fluorescent lights will provide different results. All can be accounted for by settings in your camera and you should consult your owners manual regarding white balance settings. For this topic, it is important to know that the more light available the smaller the aperture setting can be and conversely, the less light available the larger the aperture setting has to be. In some cases you may not have a choice as the available light is either very bright or very dim and cannot be controlled.
Shutter Speed
Shutter speed refers to the speed that the shutter opens and closes allowing light to touch the sensor or film. The faster speed will not allow very much light to touch the sensor. Regarding exposure, this may mean that the available light is very bright and there is no need to have a slower shutter speed. If the available light is very dim, a slower shutter speed will be necessary to make a well exposed image. In regard to the Exposure Triangle, dim lighting conditions can be overcome by using a larger aperture setting or a higher ISO setting and in some cases both. A well exposed image does not mean it will be free from blur, there are other factors that can lead to blurry images. Faster shutter speeds will reduce the amount of blur that the subject is creating. Subjects that can cause blur are hummingbird wings or leaves on trees on a windy day for outdoors and fast moving pets or concerts for indoors. Shutter speed numbers are measured in seconds and can and often are in fractions. You will hear others refer to these as fractions in the field. 1 250th (pronounced one two fiftieth) for example. Starting at 1 second it should be easy to move to slower shutter speeds of 2, 3, or 4 seconds. Speeding up the shutter is where we encounter fractions. From 1 second we go to 1/2 1/3 1/4 1/8 1/15 1/30 1/60 1/125 1/250 1/500 1/1000 Some cameras will be able to provide different shutter speed numbers in between what is shown above and some cameras are capable of shutter speeds that are as fast as 1/4000 or faster.
Take the quiz: Photo Quiz